AHB7804R-MH-V2
While on holiday with my family, we met up with my wife's cousin, who asked if I was interested in having a look at this surveillance camera recorder (DVR).
The problem he encountered was that any function he tried to access would result in this cryptic error after entering the password: SystemMaintaining!Contact Installer Plz.. For better visibility, I've included the error message in every available language below: (source: /custom/data/Strings/)
- Arabic: صيانة النظام، يرجى الاتصال الهندسة!
- Brazilian: Manutenção do sistema, entre em contato com a engenharia!
- Czech: Údržbu systému, obraťte se prosím na strojírenství!
- English: SystemMaintaining!Contact Installer Plz.
- Farsi: تعمیر و نگهداری سیستم، لطفا با مهندسی!
- French: La maintenance du système, s'il vous plaît contacter le génie!
- German: Bei Fragen kontaktieren Sie bitte den technischen Support!
- Greek: Συντήρησης του συστήματος, παρακαλούμε επικοινωνήστε με την μηχανική!
- Indonesian: Pemeliharaan sistem, silahkan hubungi rekayasa!
- Italian: Manutenzione del sistema, si prega di contattare l'ingegneria!
- Japanese: システムメンテナンス、エンジニアリングにお問い合わせください!
- Portugal: Manutenção do sistema, entre em contato com a engenharia!
- Russian: в процессе обслуживания, соединить с инженеров пожалуйста!
- SimpChinese: 系统维护中,请联系工程商!
- Spanish: El mantenimiento del sistema, por favor póngase en contacto con la ingeniería!
- Thai: การบำรุงรักษาระบบกรุณาติดต่อวิศวกรรม!
- TradChinese: 系統維護中,請聯繫工程商!
- Turkey: Sistem bakım, mühendislik irtibata geçiniz!
- Vietnamese: Bảo trì hệ thống, vui lòng liên hệ với các kỹ thuật!
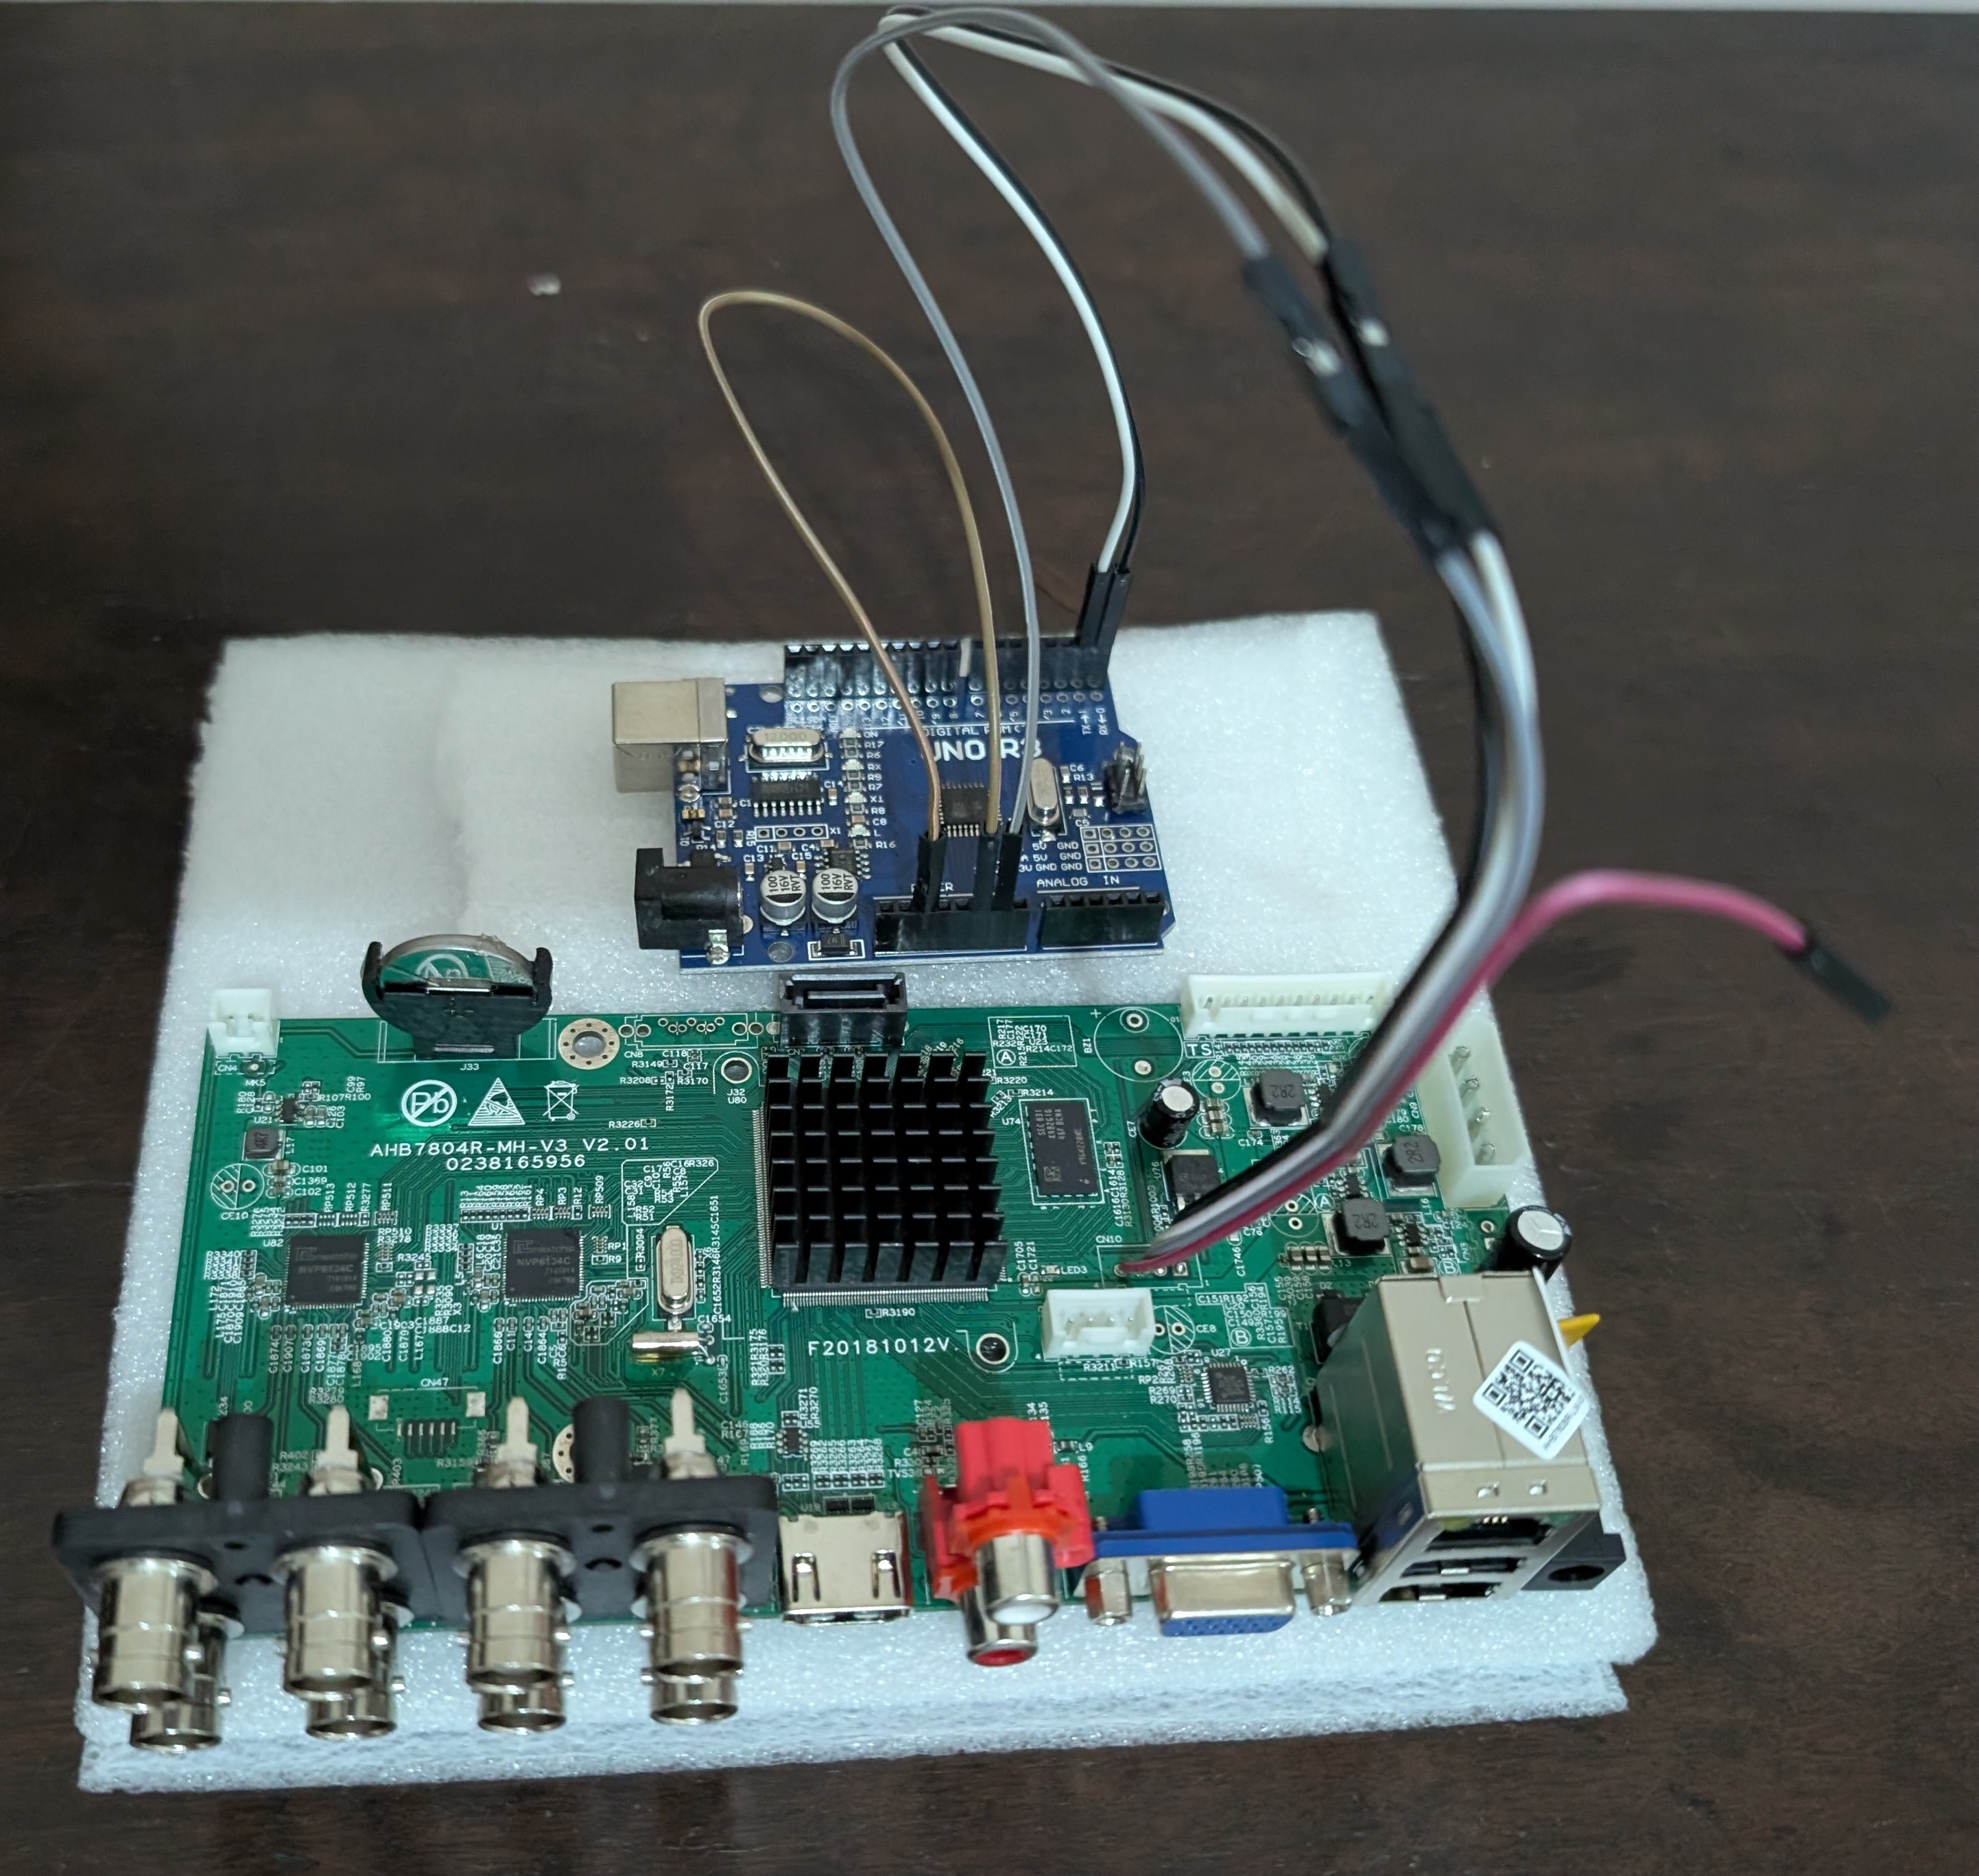
He had found a Portuguese-language video explaining how to perform the fix and had already soldered wires to the UART and connected an Arduino Uno to use as a serial adapter.
Even though this is much newer than what I usually work on, I couldn’t resist the challenge. So, I started by making backups of the current flash partitions. (See the information below on how to do this—although I would recommend doing it from BusyBox. Using U-Boot requires a TFTP server on a host computer to receive the files.)
After that, I tried to follow the instructions in the video:
- Calculate the start offset for the partitions using the data in
printenvmtdparts:mtdparts=hi_sfc:192K(boot),2432K(romfs),3520K(usr),1664K(custom),64K(logo),320K(mtd).
This is done by adding up the size of each partition to the start offset of the previous. For example:
- BOOT starts at 0 and is 192K in size
- ROMFS thus starts at 192K and is 2432K in size
- USR starts at 2624K (2432+192) and is 3520K in size
- etc.
Once you have the offsets:
- Multiply them by 1024 to convert to bytes and then convert to HEX using a calculator.
- Erase the mtd partition using:
sf erase 0x<start> <length>
However, I got stuck when I tried to erase the flash from U-Boot, it was protected. I tried a few options to remove the protection, but nothing worked. The only other option was to try to get an interactive shell and erase the data from Linux.
After a lot of trial and error, I found a way to get it to work, and I successfully erased the partition using dd if=/dev/zero bs=1024 of=/dev/mtdblock5. Initially this seemed to have resolved the issue; the system now came up with the configuration wizard, and I could login as admin without a password. However, I quickly noticed that none of the settings were persisting. Some digging later, I found that the mtd partition no longer got mounted:
jffs2: Cowardly refusing to erase blocks on filesystem with no valid JFFS2 nodes
I tried different options, but found that there was no way to recreate a JFFS2 file system on the board itself. So I restored the original partition, mounted it, and just erased its contents. After this, settings started to persist correctly again.
I've documented all the steps to recover the system, as well as everything else I've found (including a potential backdoor) below:
Boot into BusyBox
Press CTR+C when prompted to stop the boot process and paste the following:
setenv bootargs 'mem=80M root=/dev/mtdblock1 rootfstype=squashfs mtdparts=hi_sfc:192K(boot),2432K(romfs),3520K(usr),1664K(custom),64K(logo),320K(mtd) coherent_pool=2M init=/bin/sh'
run bootcmd
If this doesn't work, check printenv for the bootargs line and use that instead; only add init=/bin/sh to the end to get a shell. I also had to remove the console= section, otherwise nothing would be displayed after loading the kernel.
Wait for the # prompt, then paste:
/etc/init.d/dnode
echo /sbin/mdev > /proc/sys/kernel/hotplug
mdev -s
mount -t squashfs /dev/mtdblock2 /usr
mount -t squashfs /dev/mtdblock3 /mnt/custom
mount -t cramfs /dev/mtdblock4 /mnt/logo
mount -t jffs2 /dev/mtdblock5 /mnt/mtd
mount -t ramfs  /dev/mem        /var
If this doesn't work, check the contents of /etc/inittab and /etc/init.d/ and look for mount commands.
Clear the configuration to fix the issue
Paste this command, then restart the board.
rm -rf /mnt/mtd/*
Dump images from BusyBox
Just connect a FAT formatted USB stick.
mount /dev/sda1 /mnt/usb
dd if=/dev/mtdblock1 bs=1024 of=/mnt/usb/boot.bin
dd if=/dev/mtdblock2 bs=1024 of=/mnt/usb/usr.bin
dd if=/dev/mtdblock3 bs=1024 of=/mnt/usb/custom.bin
dd if=/dev/mtdblock4 bs=1024 of=/mnt/usb/logo.bin
dd if=/dev/mtdblock5 bs=1024 of=/mnt/usb/mtd.bin
Restoring an image is just as easy:
dd if=/mnt/usb/mtd.bin bs=1024 of=/dev/mtdblock5
Dump images through U-Boot
This is complicated and requires a TFTP server, I recommend using busybox instead.
setenv ipaddr 192.168.20.2
setenv serverip 192.168.20.1

sf probe 0

sf read 0x80000000 0 0x30000
tftp 0x80000000 boot.bin 0x30000

sf read 0x80000000 0x30000 0x260000
tftp 0x80000000 romfs.bin 0x260000

sf read 0x80000000 0x290000 0x370000
tftp 0x80000000 usr.bin 0x370000

sf read 0x80000000 0x600000 0x1A0000
tftp 0x80000000 custom.bin 0x1A0000

sf read 0x80000000 0x7A0000 0x10000
tftp 0x80000000 logo.bin 0x10000

sf read 0x80000000 0x7B0000 0x50000
tftp 0x80000000 mtd.bin 0x50000

sf read 0x80000000 0 0x800000
tftp 0x80000000 full.bin 0x800000
Suspected backdoor
According to /etc/init.d/rcS, if there is an eth2 present, it's initialized with a fixed IP:
ifconfig eth2 up
ifconfig eth2 192.168.1.12
After this, telnetd is started:
telnetd &
However, it immediately crashes, because no network interfaces are up yet:
dvrbox/dvrHelper.c(390) [dvrHelper_main]: pthread_create TelnetdProc_thrd OK!
dvrbox/telnetd_proc.c(405) [TelnetdOpen_isAuto]: Get telnetctrl Fialed, telnetctrl=1
dvrbox/telnetd_proc.c(405) [TelnetdOpen_isAuto]: Get telnetctrl Fialed, telnetctrl=1
dvrbox/telnetd_proc.c(115) [InvokeSystemRunScript]: system error!
dvrbox/telnetd_proc.c(566) [TelnetdProc_thrd]: Close Telnetd Failed:Read-only file system!
There is a weakly encrypted password for the root user in /etc/passwd:
root:absxcfbgXtb3o:0:0:root:/:/bin/sh
With less than 5 minutes of John the ripper, we have the unencrypted password: xc3511
Unfortunately, I don't have two recognized USB to Ethernet adapters available to test if telnet will be started automatically, but I was able to start telnetd successfully after manually initialising eth0 and login with this password.
ifconfig eth0 up
ifconfig eth0 192.168.1.12
telnetd